buckadam+FollowUnemployed for 3 Months. I Found a "Brand New" Bike at the Flea Market.My kid wished for a bike. I couldn't bear to tell him Dad can barely afford gas. To make it happen, I scoured flea markets and found an old one for $15. I spent three nights in the garage sanding, painting, and replacing the grips. Seeing him scream with joy at his shiny "new" bike this morning made every blister worth it. Poverty shouldn't steal a child's joy. #DadLife #DIY #FrugalChristmas #Love00Share
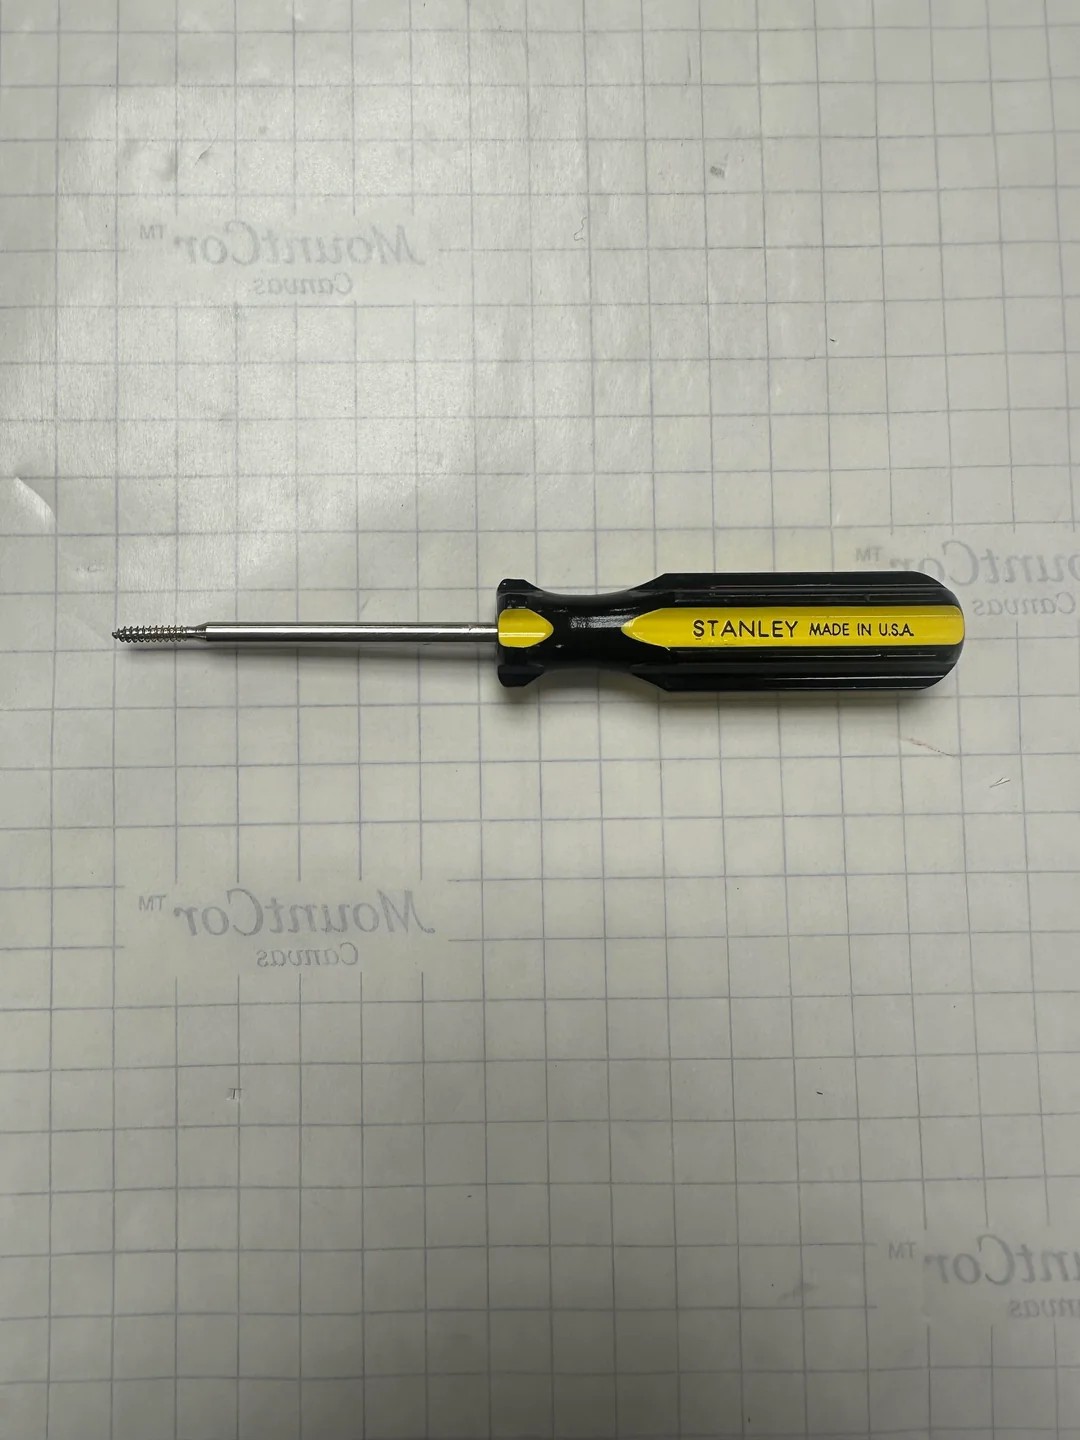
Nina +Followwhat is this?You cannot predrill with this, it just shreds wood. What exactly is this thing even used for? #Woodworking #DIY #Tools #HelpNeeded #WhatIsThis 00Share
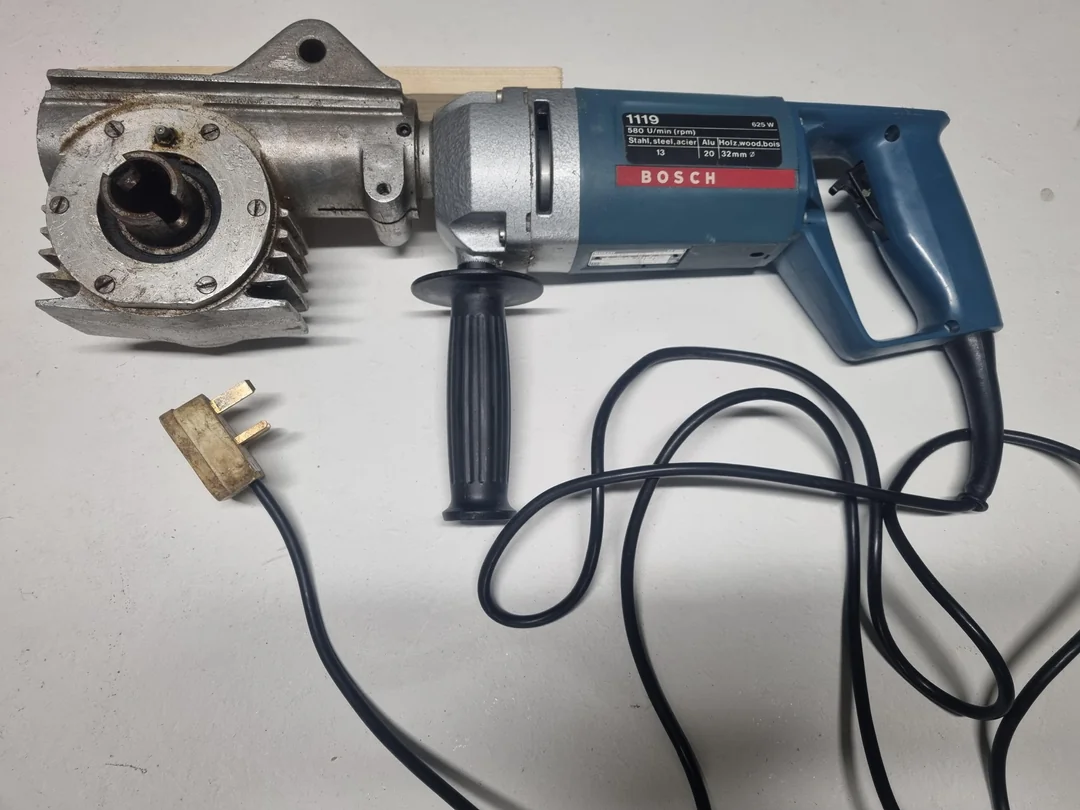
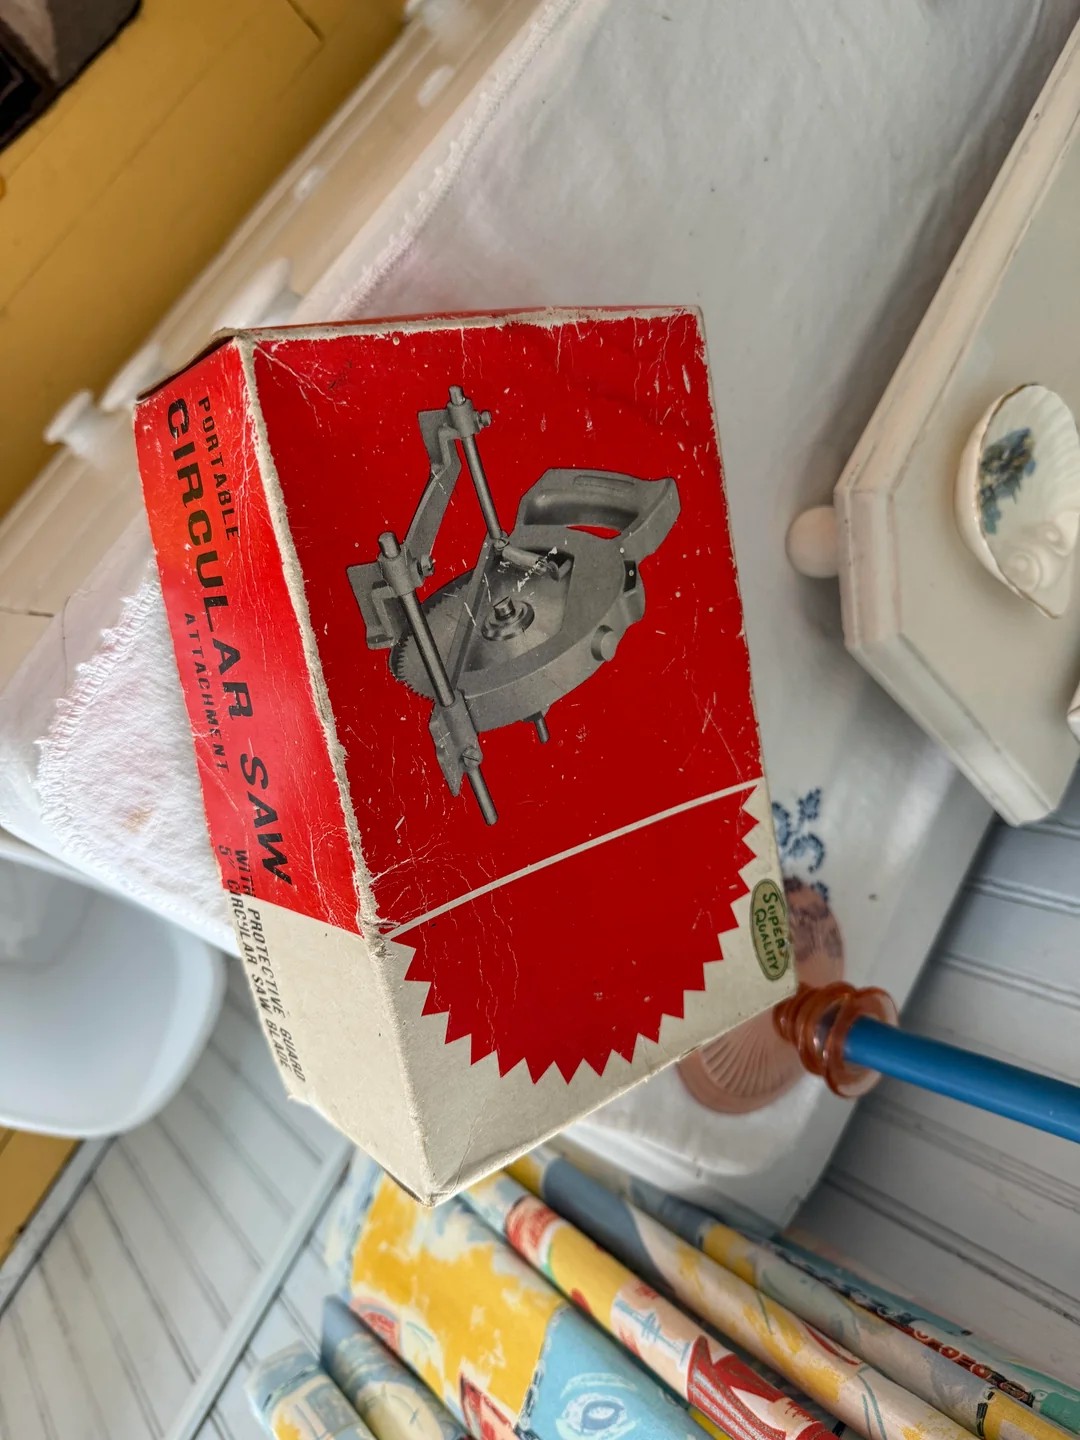
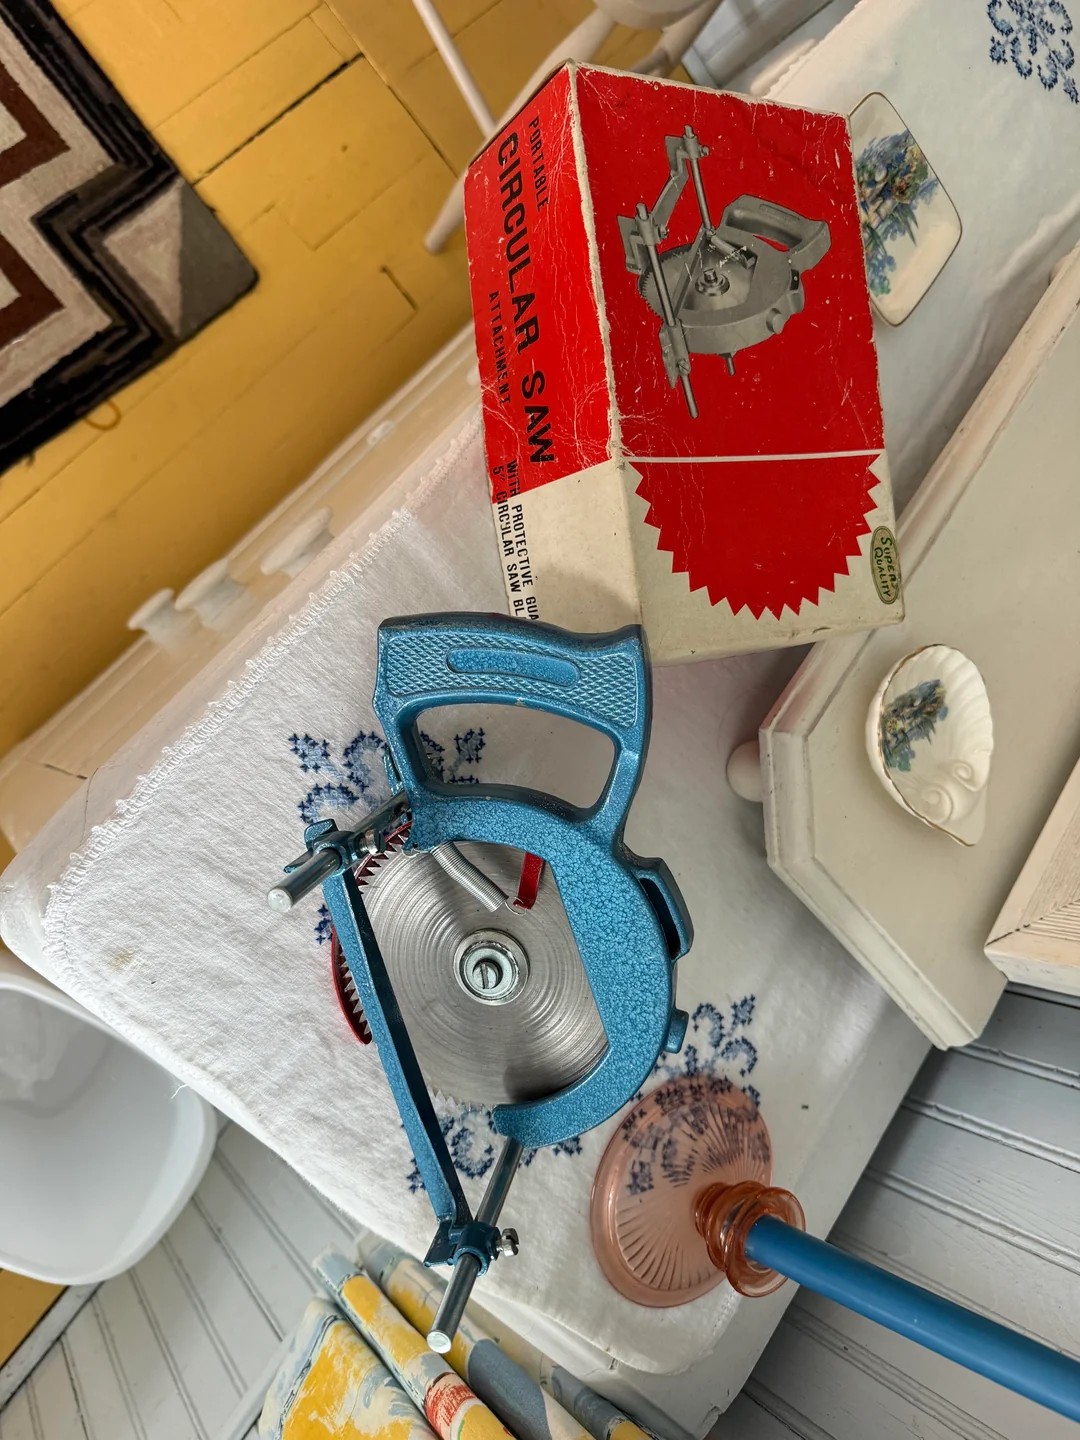
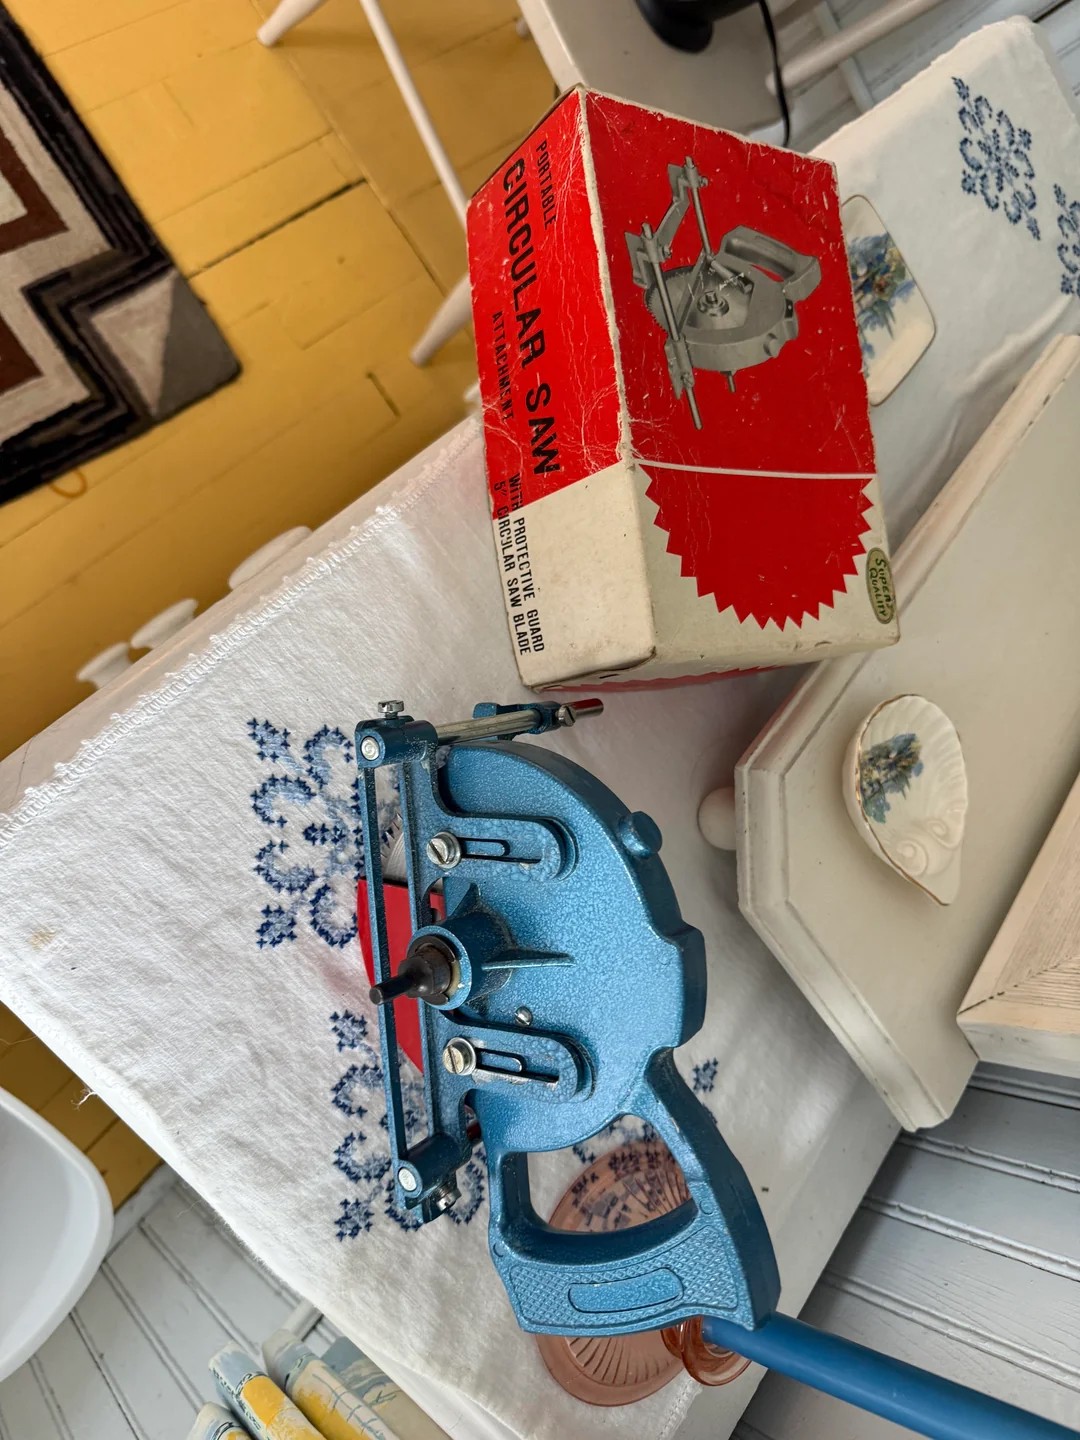
Nina +FollowWhat can I use it for? And what is the right name for this?I just came into possession of this old electric drill that has a gear reduction attachment bolted to the front. I included a picture of the find. This thing converts the drill's high RPM into serious low-speed torque. It looks like it could turn the crank on a small submarine, but its original purpose was actually bizarre. It was originally used on chicken farms to slowly pull a long roll of paper liner in battery cages. I am determined to find a cool modern application for this. And does anyone know a name for this tool? (Google's AI thinks it's a nibbler for metal work - nope.) Need serious suggestions. #Tools #WhatIsThis #DIY #HighTorque #OldTools 89Share
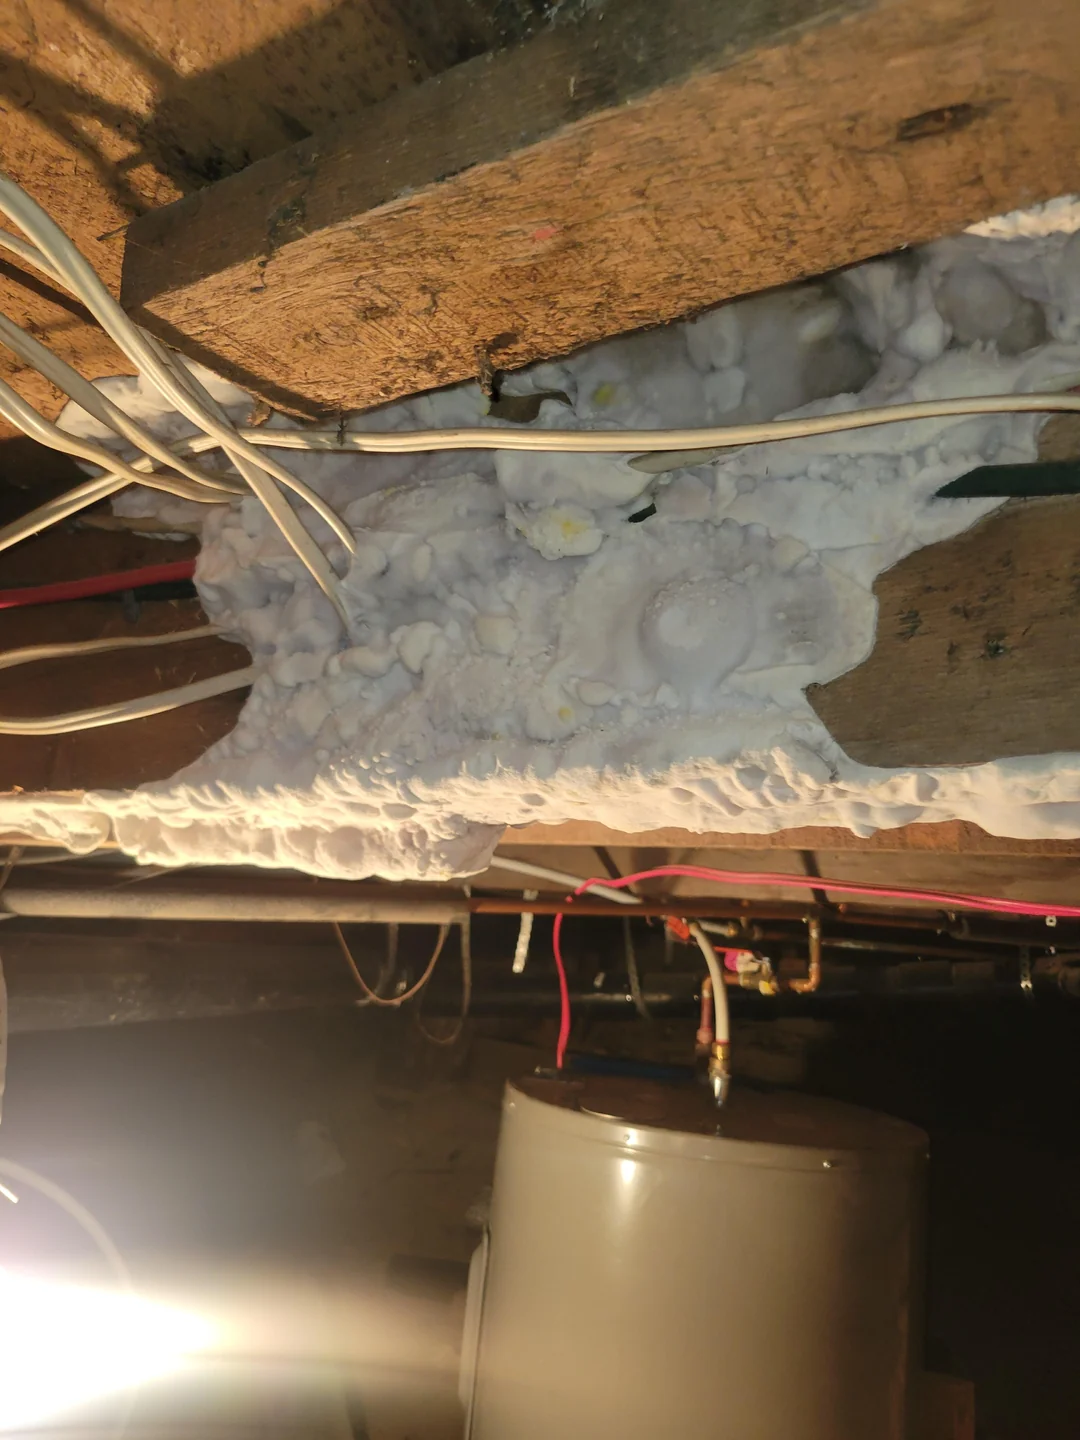
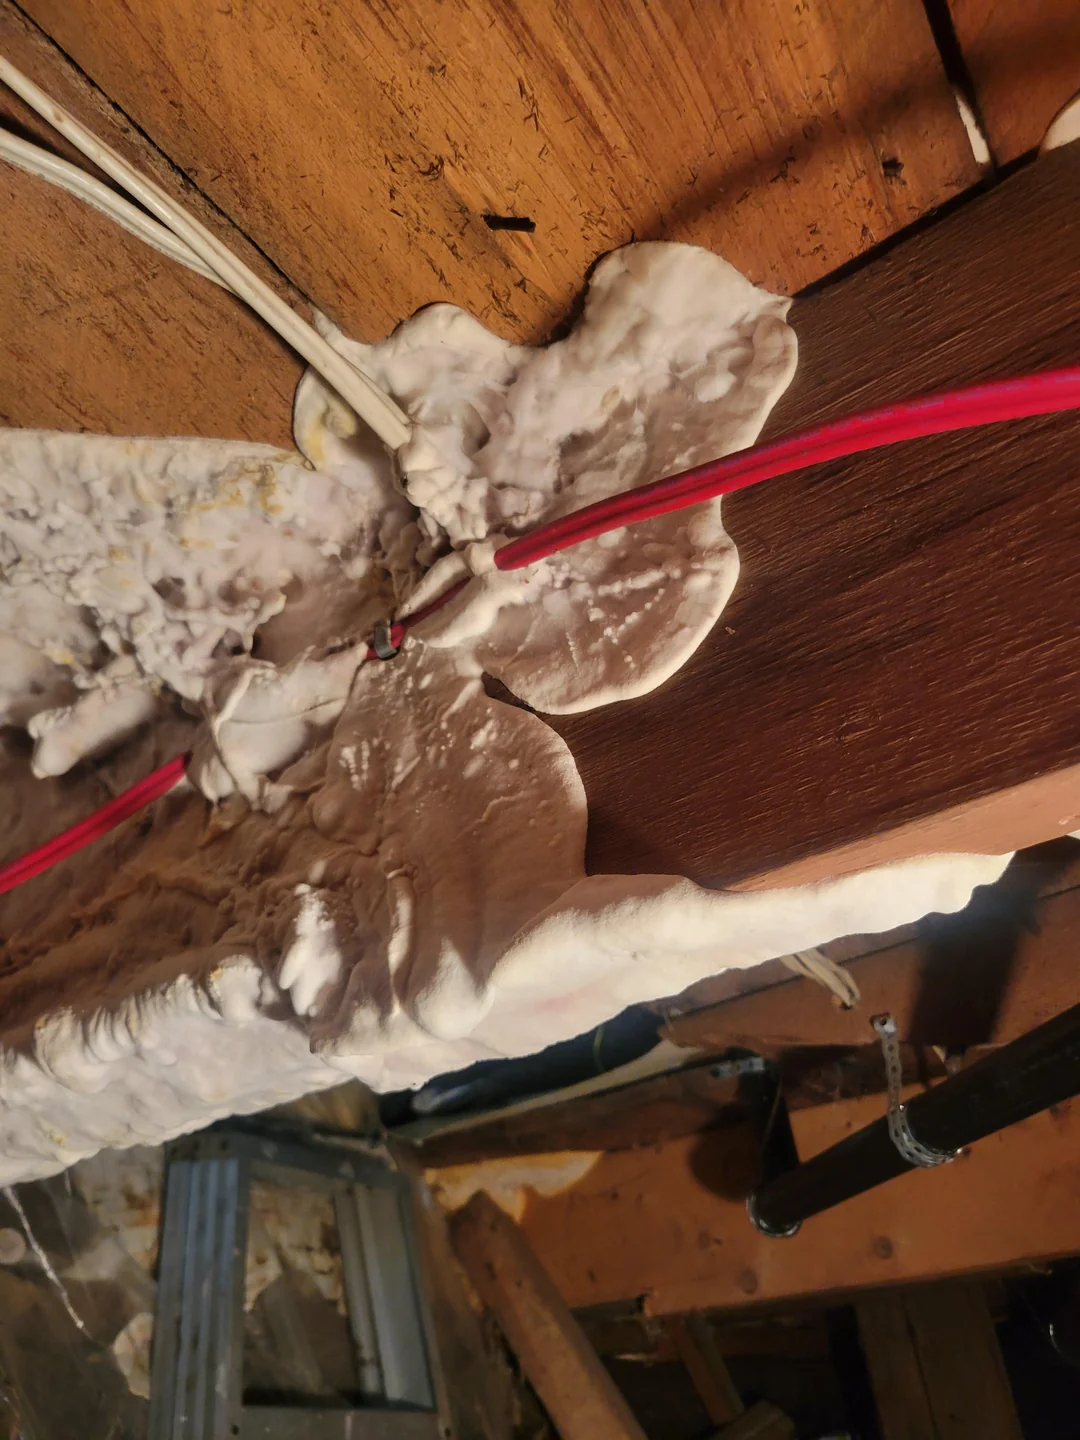
Jennifer Russell+FollowI Found White Stuff ALL OVER My Crawl Space. How Bad Is This Mold Going to BeI went down into my crawl space today for the first time in a while and got hit with a sinking feeling. There is white stuff absolutely everywhere down there now, covering the wood and surfaces. This wasn't here before. The really annoying part is that I had a plumber down there not long ago, and I am genuinely surprised he did not say anything about it. #Mold #HomeownerProblems #HelpMe #DIY 42Share
David Hernandez+FollowI was at a garage sale and found this little toolGonna run to HF and grab a little Predator gas motor for that bad boy. #GarageSaleFinds #VintageTools #DIY #PowerTools #WeirdTools #CircularSaw #Home 8633Share
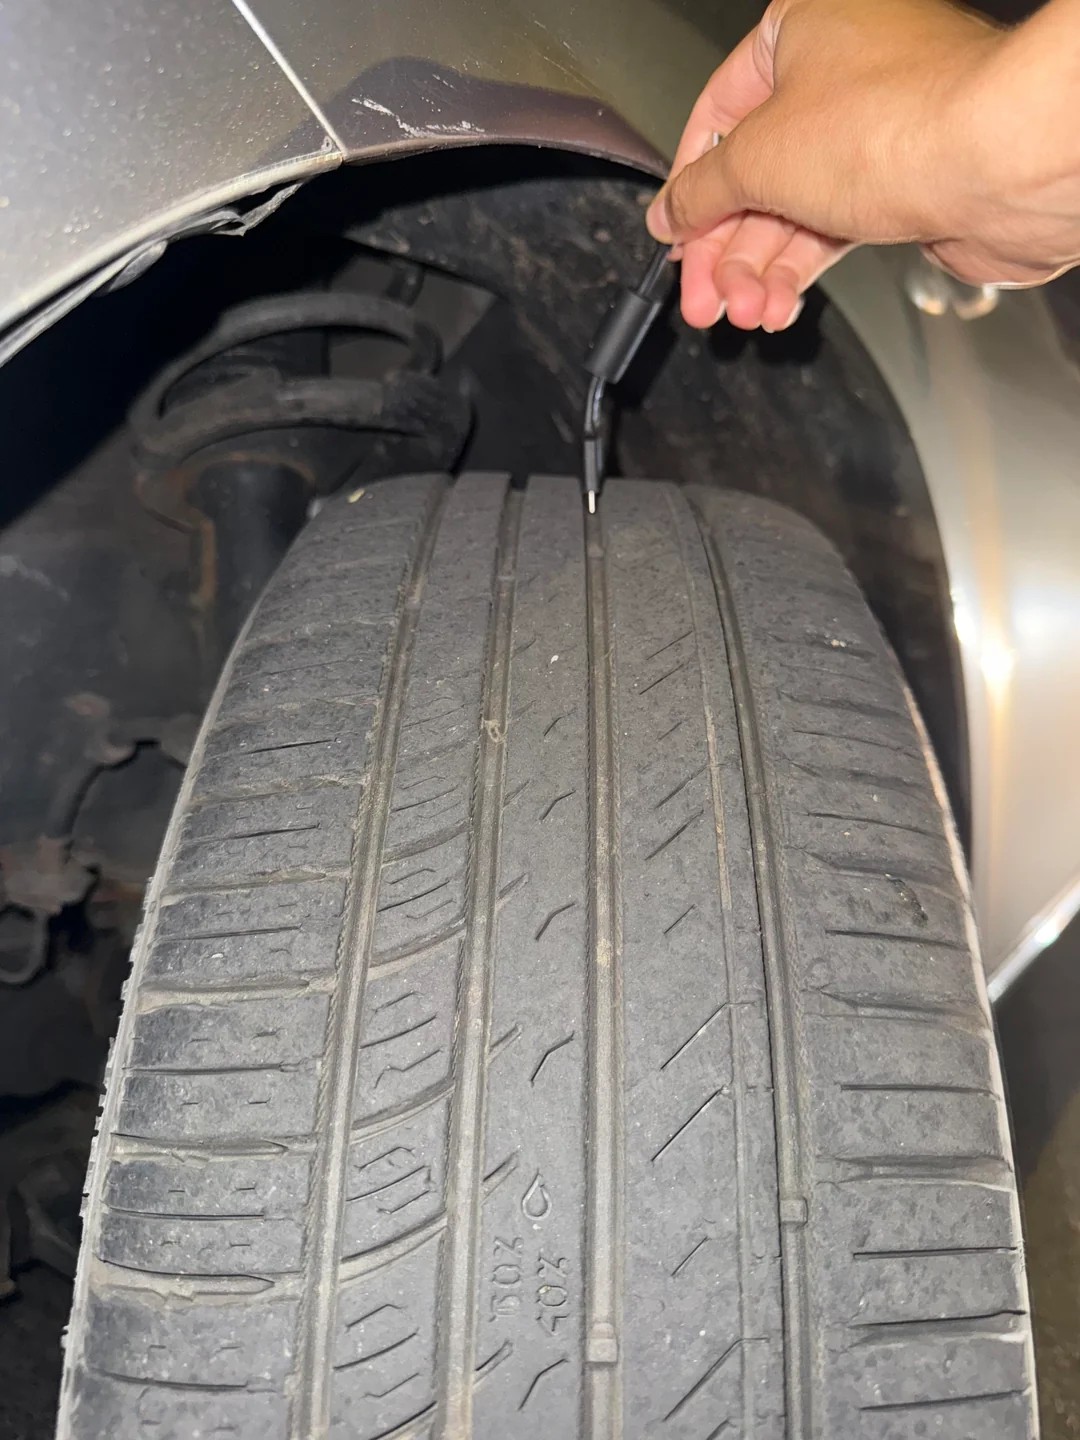
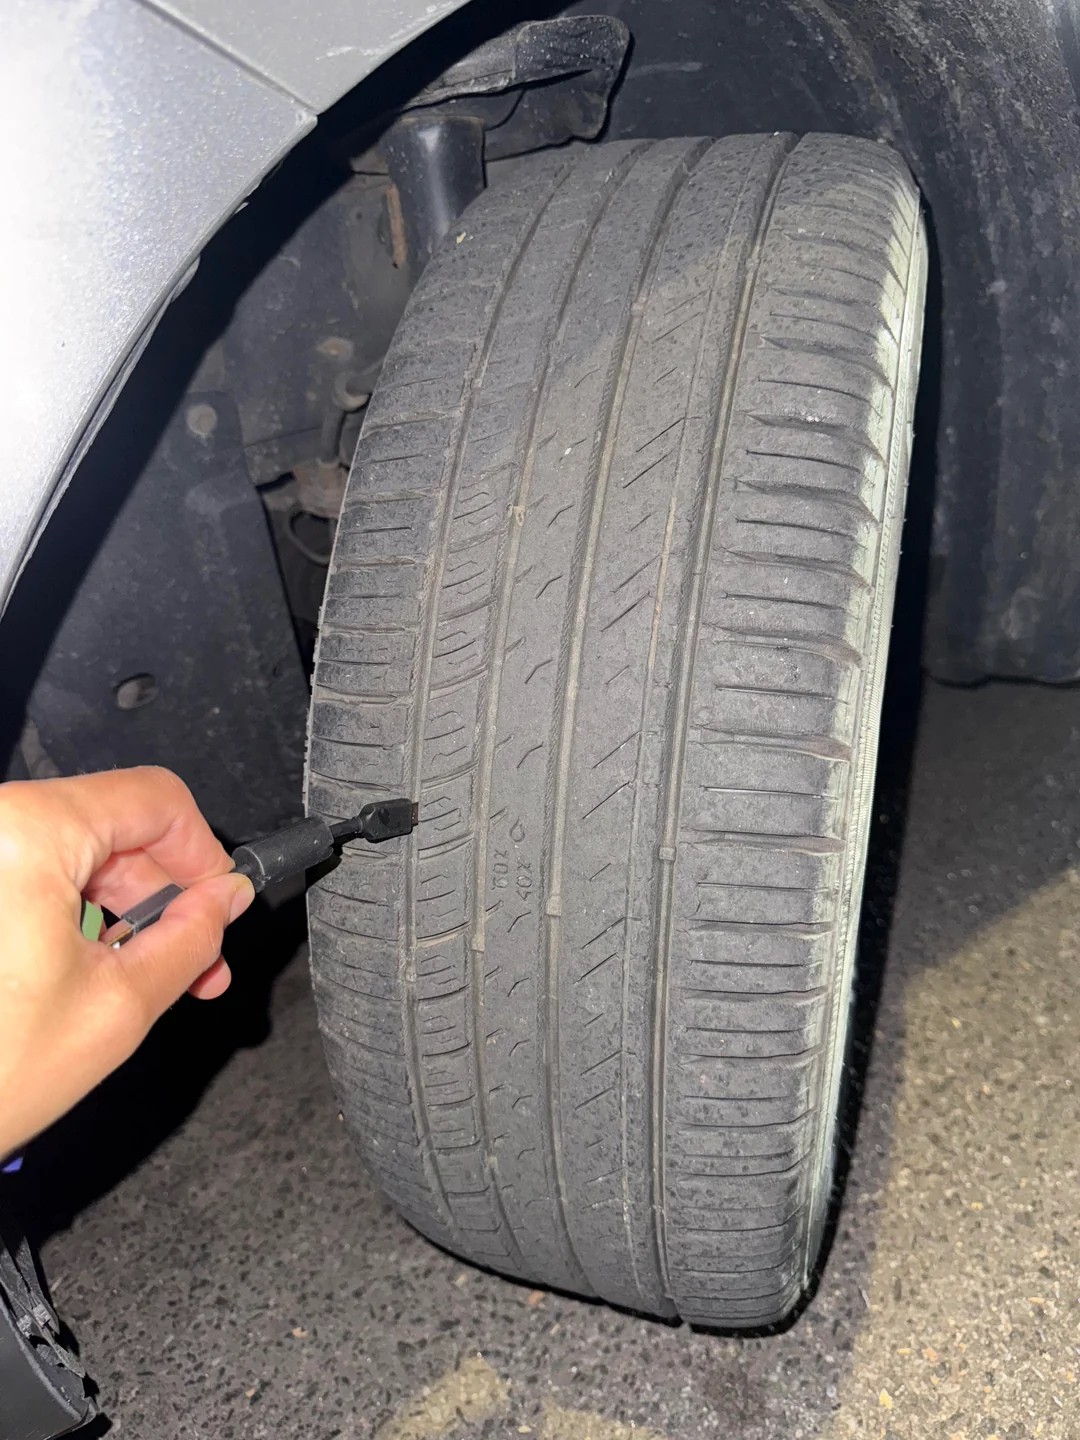
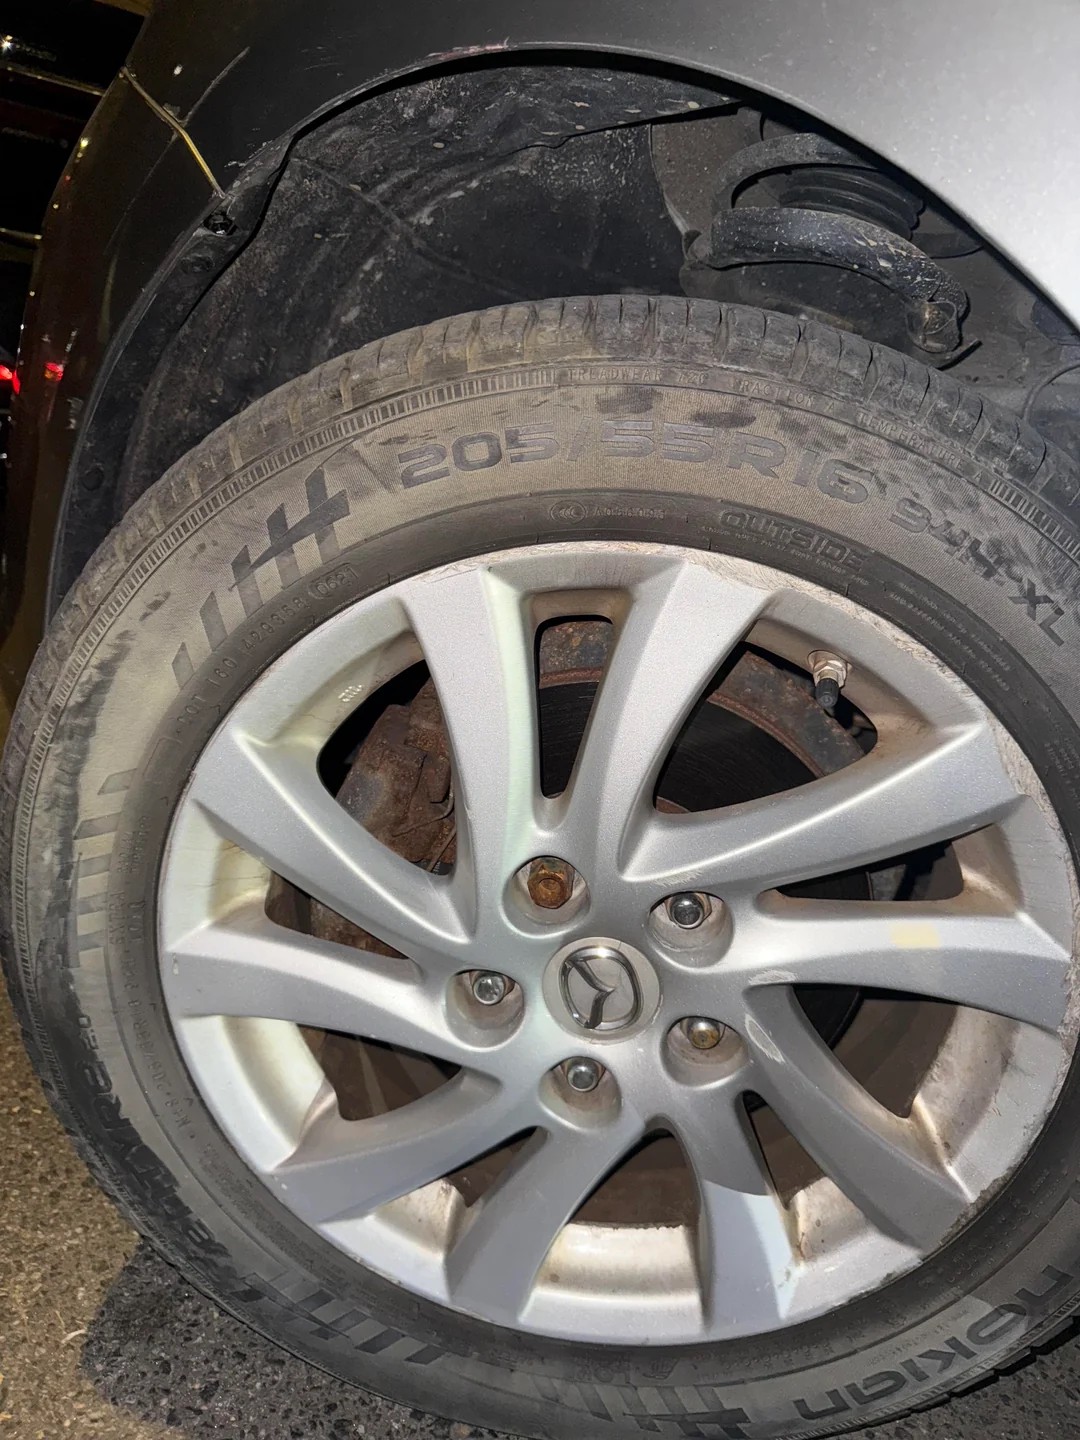
dennis03+FollowMy mechanic said I need a new tire, but he couldn't even tell me whyI took my 2012 Mazda 3 in for a look because it is making a clunking sound after I hit a jump. The mechanic said I needed a new control arm, which makes sense to me. But then he told me I also needed a brand new tire. I was pretty confused. The tires are only two years old and I can't see anything wrong with them. I asked the mechanic what the problem was and he just ran his hand over it and said he could "feel it." He gave me no other explanation. I also thought the price was ridiculous. He said it would be $150 for just one tire. I paid about $300 for a whole set of them on sale at Walmart. This is not a dealership either, just a new random guy I've never seen before. Does anyone have a clue what he could have been talking about? #CarTrouble #MechanicAdvice #DIY #CarRepair #AutoRepair #HelpMe #HelpNeeded #CarTires 82134Share